|
Making your own woad balls
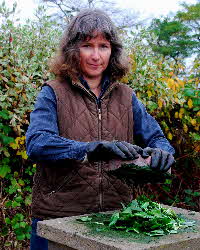
 Wear rubber gloves, unless you want to stain your nails and have your hands smelling of woad for two days! First you need to harvest and wash the woad leaves as you need fresh leaves to make woad balls. You now need to break the leaves up to end up with long fibres. Do not use a blender or food processor, as they cut up the fibre in such small pieces that you will not be able to make woad balls. I cut the leaves into one inch long pieces with a pair of secateurs and then place them on a concrete slab. Wear rubber gloves, unless you want to stain your nails and have your hands smelling of woad for two days! First you need to harvest and wash the woad leaves as you need fresh leaves to make woad balls. You now need to break the leaves up to end up with long fibres. Do not use a blender or food processor, as they cut up the fibre in such small pieces that you will not be able to make woad balls. I cut the leaves into one inch long pieces with a pair of secateurs and then place them on a concrete slab.
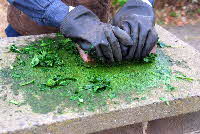
 I then use a solid brick or a paver to crush the leaves to a pulpy paste with a circular grinding motion. You can also grinding the leaves between two bricks or put the leaves over a piece of wood or in a wooden barrel cut in half and chop them repeatedly with a sharp spade. You will find that this action produces a large amount of thick green liquid run-off. Apparently this liquid is mainly chlorophyll, and contains almost no pigment. I then use a solid brick or a paver to crush the leaves to a pulpy paste with a circular grinding motion. You can also grinding the leaves between two bricks or put the leaves over a piece of wood or in a wooden barrel cut in half and chop them repeatedly with a sharp spade. You will find that this action produces a large amount of thick green liquid run-off. Apparently this liquid is mainly chlorophyll, and contains almost no pigment.

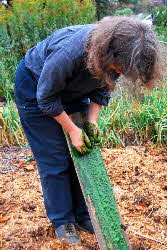
Leave the pulp to drain for a couple of hours, squeezing it from time to time. You can then knead the pulp into balls the size of a small orange. I found that by placing a piece of wood against my knees, bending down over the wood like the waddies did, and kneading the woad against the wood, any remaining liquid runs down to the ground. You need to remove as much liquid as possible; otherwise the balls are likely to go mouldy.
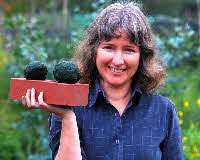
 Leave the woad balls to dry in an airy place. You might need to cover the balls with netting to protect them from flies. When dry, the balls will last for years. I have not made enough woad balls to figure out how to couch them, but I am wondering whether placing the ground woad balls in a moist a propagator kept in a dark place would work. Watch this space! Leave the woad balls to dry in an airy place. You might need to cover the balls with netting to protect them from flies. When dry, the balls will last for years. I have not made enough woad balls to figure out how to couch them, but I am wondering whether placing the ground woad balls in a moist a propagator kept in a dark place would work. Watch this space!
Top of Page
|