|
12 Steps to Extraction of Woad Dye - Page 1
A. Harvesting woad leaves & preparation (this page)
|
|
|
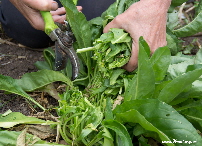
1. cutting woad leaves
|
|
|
|
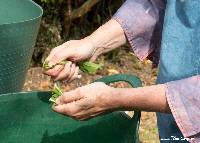
2. tearing woad leaves
|
|
|
|
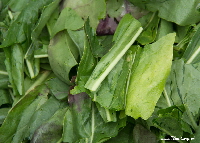
3. torn woad leaves
|
|
|
|
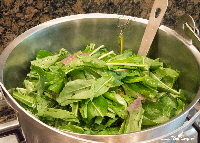
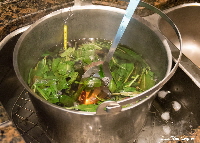
4. steeping woad leaves
|
|
|
|
5. cooling liquid with ice
|
|
|
|
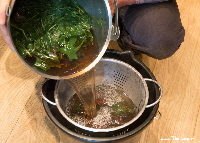
6. straining the woad liquid
|
|
|
|
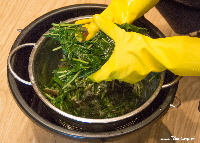
7. squeezing woad leaves
|
|
|
|
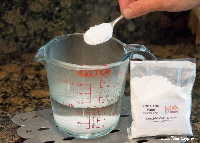
8. adding soda ash
|
|
|
|
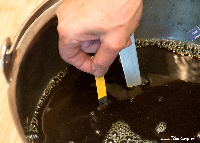
9. measure pH
|
|
1. Harvesting woad leaves
2. Tearing the woad leaves
3. Steeping the woad leaves
4. Cooling the woad liquid
5. Straining the woad liquid
6. Adding soda ash
1. Harvesting the woad leaves
July and August are the best months for harvesting woad in the UK. Cut the leaves from first year woad plants with secateurs, near to their base (fig. 1), and cut enough leaves to fill a plastic carrier bag (about 1250 grams of leaves). Wash the leaves well. If you have a water butt full of water you can put the leaves in the water butt; the leaves will float and you can swish them about to clean them.
2. Tearing the woad leaves
Tear the leaves by hand (fig. 2) but don’t tear them too small (fig. 3) otherwise they will go through the colander later on. There is little blue in the stalks and if you have more leaves than will fit in your saucepan you can remove all of the stalks. Process the leaves as soon as possible after harvesting, ideally within an hour if you can. If you can't process the woad straight away, keep the leaves in a closed plastic carrier bag and in cool shade but not in the fridge.
3. Steeping the woad leaves
Fill a 10 litre stainless steel saucepan two-thirds full with water. It is best to use soft water, e.g. rain water, if you can. Heat the water up to 90° C but do not let it boil in the saucepan. Turn the heat off, put the leaves in the saucepan (fig. 4) and put the lid on. Let the leaves steep for 10 minutes [some dyers steep the leaves for 20 to 30 minutes or even an hour, so you might like to experiment with different times if you have plenty of leaves]. When the leaves are in the water, the temperature goes down to 80° C, which is the temperature that you want.
4. Cooling the woad liquid
Remove the saucepan from the heat as soon as the 10 minutes are over and put it in a sink half full of cold or icy water (fig. 5). According to Dr Hill, the liquid must cool down quickly to prevent the woad pigment from breaking down.
You should aim to get the liquid down to 55° C in 5 minutes. Keep stirring the saucepan and changing the water from the sink. You can even put a tray of ice cubes in the sink to cool the woad liquor more quickly.
5. Straining the woad liquor
When the liquid has reached 55° C, put a colander over a bucket and then strain the liquid through the colander (fig. 6), saving the liquid.
Put on rubber gloves to press the leaves and to extract all the liquid (fig. 7). Pour the liquid back into the saucepan leaving any debris behind in the bucket. The spent leaves can then go on the compost.
6. Adding soda ash to woad liquor
Fill a Pyrex jug with 250 ml of boiling water and add 3 teaspoons of soda ash, dissolve well and let it cool slightly (fig. 8).
After the liquid in the saucepan has cooled to 50° C, add the soda ash. Do not put soda ash when woad solution is over 50° C or you will destroy the blue.
The liquid will turn to a greenish-brown colour. Measure the pH (fig. 9) which should be alkaline and about 9. If the pH is below 9 and more acid (for example, 7 or 8), add a little more soda ash.
Next Steps:
7. Aerating the woad liquid
8. Settling out the woad pigment
9. Cleaning the woad pigment
10. Drying the woad pigment
11. Filtering the woad pigment
12. Dyeing with woad
Looking for our old page on woad pigment extraction? The old text & photos for extracting woad pigment are here.
Top of page
|