Extracting the woad pigment - page 2
List of requirements for woad pigment extraction
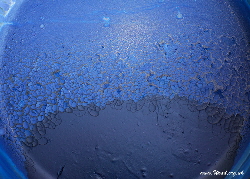 - plastic plant pot (with holes in the bottom) or a hand whisk - plastic plant pot (with holes in the bottom) or a hand whisk
- old plastic yogurt pot
- several empty coffee jars
- glass siphon (turkey baster)
- funnel (optional)
- piece of habotai silk (optional)
12 Steps to Extraction of Woad Dye
A. Harvesting woad leaves & preparation (page 1)
B. Extracting woad pigment 2 (this page)
|
|
|
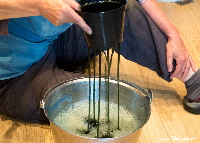
10. aerating woad liquid with plant pot
|
|
|
|
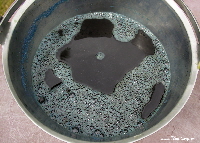
11. green froth on woad liquid
|
|
|
|
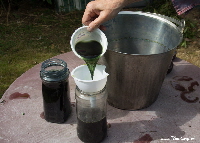
12. decant woad liquid into jars
|
|
|
|
13. pouring liquid via funnel
|
|
|
|
14. using a glass pipette
|
|
|
|
15. woad pigment in jar
|
|
|
|
16. clean blue woad pigment
|
|
|
|
17. woad liquid on plate
|
|
|
|
18. dry woad pigment on plate
|
|
|
|
19. dry woad pigment flakes
|
|
|
|
Buy woad here
|
|
7. Aerating the woad liquid
8. Settling out the woad pigment
9. Cleaning the woad pigment
10. Drying the woad pigment
11. Filtering the woad pigment
12. Dyeing with woad
7. Aerating the woad liquor
The liquid now needs to be aerated to introduce oxygen and cause the blue pigment to precipitate. You can aerate the liquid with a hand whisk or pour the liquid from one saucepan to another. Another very effective way to aerate is by dipping a plant pot (of the type with holes in the bottom) in the saucepan (fig. 10). Lift it above the saucepan and let the liquid drip through the holes in the bottom of the plant pot, back into the saucepan. Using the plant pot is fun and less tiring on the arms than using a hand whisk.
It takes at least 10 minutes for a froth to develop. The froth should turn blue and then green again (fig. 11). Sometimes the froth remains blue however long you whisk but this does not seem to affect the results. Once, in late September, I had almost no blue in the froth but a large amount of woad pigment settled out.
It takes up to two hours for the froth to subside and when that happens you end up with a dark green solution with no hint of blue in it.
Some dyers start to dye with woad at this stage by adding about a teaspoon of spectralite (or 2 teaspoons of dithionite) and keeping the liquid warm for about an hour. I prefer to settle and ‘wash’ the pigment before making a dye pot.
8. Settling out the woad pigment
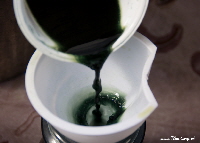
Let the pigment settle undisturbed for 2 to 3 hours. Using an old plastic yoghurt pot, carefully ladle out a third of the liquid from the top of the pan into a bucket (fig. 12). Pour the remaining liquid into 4 or 5 large coffee jars with the help of a funnel (fig. 13). Put the jars in the shade and let the sediment settle for a couple of hours.
Gently tip the liquid from the top of each jar into the bucket, leaving the last 6 cm of liquid in each jar. Consolidate the contents of the jars into one jar.
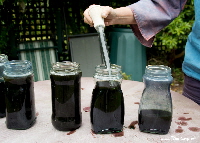
Instead of tipping the liquid, you may find that a pipette (fig. 14) will allow you to remove most of the unwanted liquid with little disturbance to the pigment in the bottom of the jar. Glass siphons sold as turkey basters in kitchenware shops are ideal. Pipettes sold in wine making shops are often not very useful, as they are designed to remove pigment from the bottom of a container, rather than skim liquid from the top.
There may be a small amount of pigment left in the bucket, which you can either try to rescue or throw the contents of the bucket away.
9. Cleaning the woad pigment
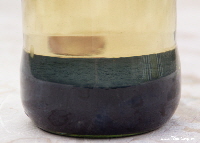
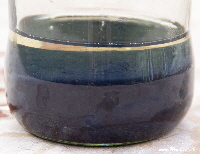
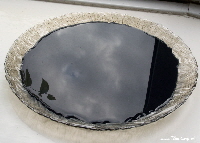
Let the liquid in the jar settle for a couple of hours. You may then see a blue sludge (fig. 15) at the bottom of the jar. Carefully empty 2/3 of the jar or siphon most of liquid away with a glass siphon. Then fill it again with clean water. Repeat two or three times more until there is clear water over blue sediment (fig. 16) (the pigment can be as dark as midnight blue). This is very exciting!
You now need to decide whether you want to keep the pigment in water or dry it for more permanent storage. If you keep it in water it is ready to use for dyeing and you don’t need to make a paste. If you decide to dry the woad, you will be able to weigh it and know the yield, but you will have to grind the dried woad flakes and make a paste before you use it for dyeing.
If you want to dry the pigment, see the next step. If you want to keep the pigment in water, fill the jar to overflowing one last time and put lid on tightly. The woad should last for a few weeks. It is better to use a glass jar to decant and store the woad pigment. Avoid using plastic bottles as the woad pigment has a tendency to stick permanently to the walls of the plastic bottle.
10. Drying the woad pigment
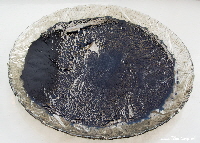
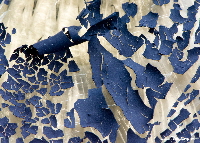
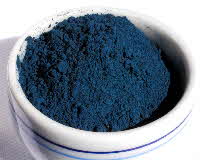
To dry the woad pigment, pour or siphon away as much water as possible from the glass jar and then empty the content of the jar onto an old plate covered with cling film (fig. 17). Keep it in a warm (but not hot) place to prevent it from going mouldy. After a few days the woad dries into flakes and peels easily from the cling film (fig. 18 & 19).
11. Filtering the woad pigment
We usually dry the pigment on a plate as described above. However, in the past we tried to filter the pigment which can be useful if you are dealing with large amounts. We experimented with different filters and found that using a piece of Habotai silk to filter the woad pigment worked best. First wet the silk fabric, then place it on a funnel, with plenty of silk overhanging the borders of the funnel. Slowly pour the liquid into the funnel. A very small amount of pigment may go through, but most of the pigment stays on the silk. Let the pigment dry on the silk and gently scrape it away with a blunt knife (for example, a palette knife).
We also tried filtering woad using an old gold-plated coffee filter but the woad went straight through. The pigment also went straight through a car pollen filter. We have also used Whatman Grade 1 filter paper, which has an 11 micron retention size, but a slightly larger micron size might also work well. The woad pigment did not go through the filter paper but it dripped very slowly and it took 24 hour for all the liquid to pass through the funnel. It was also difficult to scrape the woad from the filter paper.
12. Dyeing with woad pigment
Follow these instructions for dyeing with woad.
If you are using woad kept in water omit the step about making a paste. If you are using dried woad flakes, first grind the flakes into powder with a mortar and pestle and then make the paste.
If you only get a pale blue from your first experiment, don’t despair. To get darker colours try feeding your plants more and consolidating the pigment from several extractions. If you need larger quantities of woad or if you want to save time and energy, you can buy woad dye here.
Looking for our old page on woad pigment extraction? The old text & photos for extracting woad pigment are here.
Top of page
|